
Searching for an Old Game
Back in 2006, my wife was looking for a game she loved to play when she was a kid called Lock n’ Chase. While searching for this game, I came across the Multiple Arcade Machine Emulator, otherwise known as MAME. I instantly decided to build the toy I always wanted, and arcade cabinet. My wife quickly agreed as long as she could play Lock n’ Chase.
The Initial Build
We had recently upgraded our computer, so I had an old Windows XP system just waiting to be repurposed. This machine formed the basis of my first build of the arcade cabinet.
The Hardware:
- IPac2 keyboard encoder used to connect the arcade controls to the computer.
- Ultimate Joysticks from Suzo Happ. My configuration used (2) 4 way joysticks (one was set at an angle specifically for Q*bert), and (2) 8 way joysticks.
- Pushbuttons with horizontal switch also from Suzo Happ.
- Small single door - 2 entry also from Suzo Happ. What better way to emulate that arcade feel than to require quarters to play!
- Some cheap computer speakers.
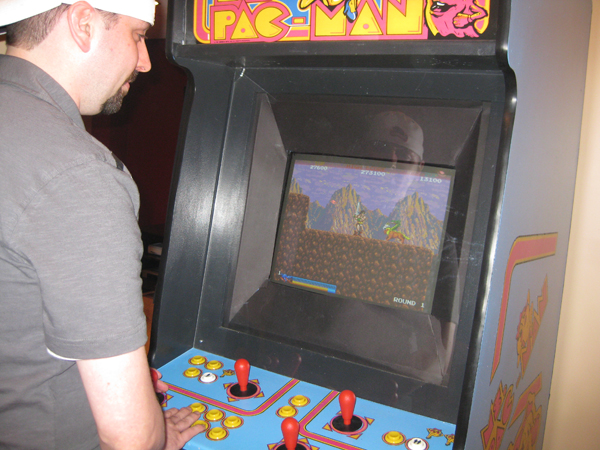
The Cabinet:
The cabinet was constructed from 3/4” MDF, which was a very bad idea. This definitely provided a solid structure, but it was at the expense of weight. The marquee and monitor were covered with Lexan, and the marquee was backlit with a cheap fluorescent light. Ms. Pacman artwork decorated the cabinet (another one of my wife’s favorite games). I guess you could call it a thank you for letting me build it. Some black T-molding completed the look.
The Software:
The Mala front end provided the GUI for the arcade. This front end provided access to the MAME, NES, SNES, Nintendo 64, Sega Genesis, and Arcade Laserdisc Emulators that I had installed, using nothing but arcade controls. To give it more of an arcade feel, I took steps to hide the OS following instructions similar to these.
The completed arcade was a blast, but I discovered I had more fun building it than playing it. Needless to say, it soon began to evolve.
The Second Iteration
The software for the arcade worked extremely well, but the OS was another story. The boot time was a little too long, and the efforts to hide the operating system led to periodic stability issues. I chose to switch to a Linux distro to speed things up, and to simplify customization. This was my first Linux experience. Being such, I chose Ubuntu.
Switching to a Linux based system required a different front end. I chose Wah!Cade, a python based application.
This setup improved boot time, and simplified tweaking the system to hide the OS. I created a custom splash screen, and the system booted directly into Wah!Cade. The arcade controls were all that was necessary to operate the system from boot to shutdown. To make changes to the system, a keyboard and mouse were included in a locked drawer that could be used to open a virtual terminal. In addition to using a virtual terminal, the user had the option to open a desktop when exiting Wah!cade.
Though the boot time improved significantly, it was still a little slow. I needed faster storage, and a lighter Linux distro. It was time to build a computer specifically for the arcade.
The Third Iteration
The Raspberry Pi would have been the perfect solution, but sadly, it wasn’t available yet. I settled on the atom based Intel Desktop Board D510MO. Instead of a standard hard drive, I chose Compact Flash cards for storage. This would increase boot time, and allow for multiple arcade configurations that could easily be swapped out. I couldn’t find a CF to SATA adapter, and settled on a CF to IDE adapter linked with an IDE to SATA adapter. A picoPSU-120 + 60W Adapter Power Kit, and 1 gb of RAM completed the system.
This system ran the lighter weight XUbuntu OS with all of the same software used in the previous iteration. It achieved the boot time I sought, and I loved being able to have multiple cards with different arcade configurations. I finally “finished” the project.
Unfortunately, we moved a few years later. I had built the arcade in our basement, and had no way to get it out without destroying the cabinet. With great sadness, I did just that.
The Final Iteration
With a baby on the way, I knew it would be a while before I had the time to rebuild the arcade. I chose to turn it into a console that I would later embed into an NES shell. With this console, I chose to once again reconfigure the operating system, selecting Arch Linux for complete control over my setup.
Instead of a full desktop environment, I installed the Ratpoison window manager. I needed to control this system with nothing but a controller, and difficulty arose when I had to map controller buttons to certain keys on the keyboard. To enable this functionality, I installed Qjoypad.
This configuration features the fastest boot time of all configurations, and is completely controllable from a USB controller. The system boots when it is plugged in, and directly loads Wah!Cade. With a specific button on the controller, the system shuts down. All that is left is to house the system in an NES shell. Ideally, I’d like to connect the NES power and reset buttons to the system providing their respective functionality. I’d also like to embed the CF card in a NES cartridge that is inserted into the original NES slot.
As you can see, this project will never be finished! The next step may be to build a small arcade for my daughter when she’s a few years older….